


Key points for personalized customization of food-grade silicone DIY decoration
Key Considerations for Personalized Food-Grade Silicone DIY Decorations
Customizing food-grade silicone decorations allows crafters to create unique, meaningful pieces tailored to specific preferences, occasions, or spaces. From incorporating initials and names to designing thematic motifs, the flexibility of silicone makes it ideal for one-of-a-kind projects. To achieve polished, professional-looking results, focus on precision in detailing, thoughtful color coordination, and functional adaptability.
Mastering Techniques for Embedding Personalized Details
Using Stencils or Laser-Cut Templates for Precise Lettering
Adding names, dates, or quotes to silicone decorations requires clean, legible lettering. Create stencils from thin plastic or cardstock by hand-cutting or using a craft knife, or design digital templates for laser-cutting if precision is critical. For raised lettering, press the stencil into wet silicone and use a tool like a silicone brush or spatula to fill the cutouts evenly. For recessed lettering, carve the design into cured silicone using a sharp, food-safe雕刻 tool (e.g., a dental pick or precision carving tool). Sand the edges gently to smooth rough spots.
Incorporating Monograms or Initials Through Layered Silicone
Layering silicone of different colors or textures creates depth and dimension in personalized designs. Start with a base layer of silicone in a neutral color (e.g., white or beige), then roll out a thinner sheet of a contrasting hue (e.g., navy or emerald). Use cookie cutters or hand-cut templates to shape initials or monograms from the top layer, then press them onto the base layer before curing. Ensure the layers bond securely by applying slight pressure and smoothing the edges with a damp finger. For a glossy finish, brush a thin layer of clear silicone over the letters after curing.
Adding Dates or Symbols Using Food-Safe Pigments or Inks
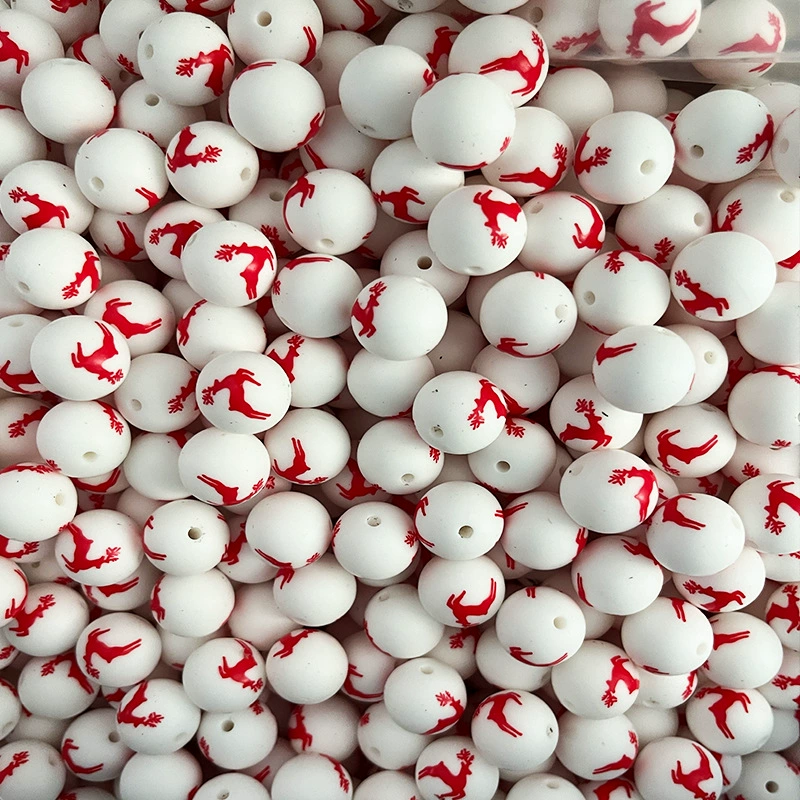
For decorations marking special occasions (e.g., birthdays, anniversaries), incorporate dates or symbolic imagery like hearts, stars, or animals. Mix food-safe pigments into liquid silicone to create custom colors, then pipe the mixture into molds shaped like numbers or symbols. Alternatively, use food-grade fabric paint or edible ink markers (tested for silicone compatibility) to draw designs directly onto cured silicone. Allow painted details to dry completely before handling, and seal them with a clear silicone spray to prevent fading or smudging.
Selecting Color Schemes and Patterns That Reflect Individual Style
Mixing Custom Colors to Match Specific Themes or Preferences
Standard silicone colors may not always align with a desired aesthetic, so learning to blend pigments is essential. Start with primary colors (red, blue, yellow) and experiment with ratios to create secondary hues (e.g., purple, green, orange) or pastel shades (e.g., lavender, mint, peach). Use a digital color mixer tool or reference a color wheel to guide combinations. For metallic accents, add a pinch of mica powder or food-safe glitter to the silicone before mixing. Test colors on a small scrap of silicone first to ensure they cure to the expected shade.
Creating Ombre or Gradient Effects for Visual Interest
Ombre designs transition smoothly from one color to another, adding a dynamic touch to decorations. Divide wet silicone into sections and mix varying amounts of pigment into each (e.g., light pink, medium pink, dark pink). Press the sections together gently, then blend the edges with a silicone brush or your fingertip to create a seamless gradient. For horizontal ombre (e.g., on a wall hanging), layer the colored silicone in strips and press them flat; for vertical ombre (e.g., on a vase), swirl the colors together in a circular motion before curing.
Pairing Bold Patterns with Neutral Backgrounds for Balance
Personalized decorations often feature intricate patterns, which can overwhelm if not balanced with simpler elements. Choose a neutral base color (e.g., gray, cream, or taupe) and add bold patterns in contrasting hues (e.g., black stripes on white, gold polka dots on navy). Use stencils, stamps, or freehand painting to apply patterns, keeping them consistent in size and spacing. For a subtler approach, opt for tone-on-tone patterns (e.g., light blue dots on darker blue silicone) or embossed designs that add texture without color contrast.
Adapting Designs for Functional Use in Different Settings
Designing Multi-Purpose Decorations for Home or Events
Personalized silicone decorations can serve dual roles, such as acting as wall art and coasters or functioning as place card holders and favors. For example, create silicone coasters with engraved names for a wedding, then hang them as ornaments after the event. Or design a table runner with removable silicone charms (e.g., initials, flowers) that guests can take home as keepsakes. Ensure functional elements (like holes for hanging or slots for cards) are incorporated during the molding process to avoid weakening the structure later.
Tailoring Shapes and Sizes to Fit Specific Spaces or Needs
The versatility of silicone allows for customization to any dimension or form. Measure the space where the decoration will be displayed (e.g., a shelf, mantel, or table) and adjust the design accordingly. For a narrow ledge, create a vertical silicone sculpture with a flat base; for a large wall, design a modular piece that can be arranged in sections. If the decoration will be handled frequently (e.g., a child’s room decor), round all edges and avoid fragile protrusions. Use flexible silicone for items that need to bend (e.g., bracelets or hair ties) and stiffer silicone for structural pieces (e.g., bookends).
Ensuring Decorations Are Easy to Clean and Maintain Over Time
Personalized items are often cherished for years, so durability is key. Avoid designs with deep crevices or hard-to-reach areas where dirt can accumulate. Opt for smooth surfaces or shallow textures that can be wiped clean with a damp cloth. If the decoration will be exposed to food (e.g., a silicone trivet with a family crest), ensure it’s fully cured and non-porous to prevent staining or bacterial growth. For outdoor use (e.g., a personalized garden marker), choose UV-resistant pigments and seal the silicone with a waterproof coating to prevent fading or cracking.
By focusing on precise detailing, harmonious color schemes, and functional adaptability, crafters can craft food-grade silicone decorations that are deeply personal and visually striking. Experiment with techniques like layering, ombre blending, and multi-purpose design to create pieces that resonate with the recipient’s style and withstand daily use.


Leave a reply