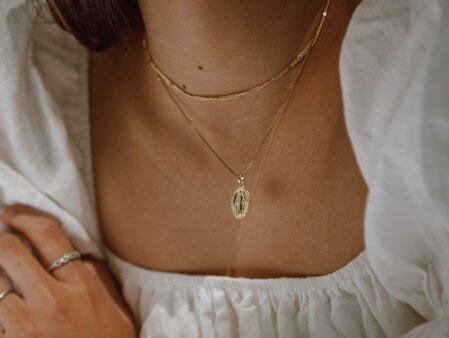
Food-grade silicone jewelry water droplet shape production
Crafting Elegant Teardrop-Shaped Food-Grade Silicone Jewelry
Food-grade silicone’s flexibility and moldability make it an ideal material for creating fluid, organic shapes like teardrops, which symbolize elegance and movement in jewelry design. Whether used for pendants, earrings, or charms, mastering the teardrop form requires attention to symmetry, curvature, and surface finish. Below are detailed techniques to achieve professional results while maintaining the material’s safety and durability.
Designing Symmetrical Teardrop Molds for Consistency
The first step in crafting a balanced teardrop is designing a precise mold. Start by sketching the shape on paper, ensuring the top (bail or attachment point) is narrower than the base to create a natural, elongated silhouette. Use digital tools like vector software to refine the outline, adjusting the curvature until the sides mirror each other perfectly. For hand-carved molds, fold the sketch in half vertically and trace one side onto clay or resin, then carve along the line to maintain symmetry.
When creating a silicone mold, consider the teardrop’s orientation. For pendants, the mold should include a recessed area at the top for a bail or jump ring, while earrings might require a flat back for comfort. Use a mold release agent (such as a thin layer of petroleum jelly or a commercial silicone spray) to prevent sticking, especially in deep or narrow sections. For added detail, etch subtle textures into the mold’s interior, like radiating lines or tiny dots, which will transfer to the silicone during curing.
Achieving Smooth Curves with Controlled Pouring Techniques
Silicone’s viscosity affects how it fills a mold and forms curves. For a flawless teardrop, use a medium-consistency silicone (similar to honey) that flows easily but retains its shape without slumping. Begin by pouring a small amount into the mold’s narrowest point, then tilt the mold slightly to let the silicone spread naturally toward the wider base. This “gravity-assisted” method minimizes air bubbles and ensures even coverage.
To eliminate trapped air, tap the mold gently on a flat surface after pouring, or use a vacuum chamber if available. For larger teardrops, pour the silicone in layers, allowing each to partially cure before adding the next. This reduces the risk of bubbles forming in deep sections and creates a stronger bond between layers. If the teardrop will have a hollow center (for lightweight earrings, for example), insert a pre-formed silicone core or use a two-part mold with a removable center piece.
Enhancing Visual Appeal with Color Gradients and Translucency
Teardrop shapes lend themselves beautifully to color blending and translucent effects. To create an ombré look, mix two or more shades of food-grade silicone dye into separate batches. Pour the lightest color into the mold first, filling about one-third of the depth. Then, slowly add the next shade along one side of the mold, letting it blend naturally with the first layer. Repeat with darker colors, tilting the mold as needed to guide the flow. The result is a gradient that mimics the way light passes through a water droplet.
For a translucent “crystal” effect, use clear silicone and embed fine glitter, crushed mineral powder, or dried flowers between layers. Pour a thin base layer, sprinkle the inclusions evenly, then add a top layer to seal them in. Alternatively, create a “frosted” finish by brushing a thin coat of white silicone paint onto the cured teardrop and wiping it away with a damp cloth, leaving residue only in the mold’s textured areas.
Refining Edges and Attachment Points for Wearability
Even with a perfect mold, teardrop jewelry may require post-curing trimming to ensure clean edges. Use sharp, food-safe scissors or a craft knife to remove any excess silicone (known as “flash”) around the base or bail. For a polished look, dip the edge in warm water (around 120°F or 50°C) to soften it slightly, then press it flat against a silicone mat or smooth stone. This creates a rounded, seamless finish that won’t irritate the skin.
Attachment points are critical for functionality. For pendants, reinforce the bail area by adding a small loop of thicker silicone or embedding a metal jump ring during curing. For earrings, ensure the post or hook is securely attached by drilling a tiny hole in the teardrop’s top and inserting a pre-coated wire (e.g., titanium or stainless steel) before adding a dab of silicone adhesive. Test the strength by gently tugging the attachment point after curing.
Adding Textural Depth with Embedded Elements and Surface Treatments
To elevate a simple teardrop, incorporate embedded objects or surface treatments that catch the light. Press tiny beads, sequins, or metallic leaf into the silicone before it fully cures, arranging them in patterns like scattered raindrops or a central sunburst. For a more subtle effect, mix fine glitter or iridescent powder directly into the silicone, then pour it into the mold in stages to create a layered, shimmering interior.
Surface treatments can also enhance texture. Use a heat gun on a low setting to gently warm the cured teardrop, causing the silicone to shrink slightly and create wrinkles or ripples that mimic the look of melted wax. Alternatively, apply a thin coat of food-grade silicone gel to the surface, then press a textured fabric (like lace or burlap) into it. Peel away the fabric after curing to leave an imprint that adds depth and tactile interest.
By focusing on mold precision, pouring techniques, and creative finishes, designers can transform food-grade silicone into teardrop jewelry that is both visually striking and comfortable to wear. These methods cater to the growing demand for unique, handcrafted accessories while ensuring each piece meets safety standards for prolonged skin contact.


Leave a reply