


Silicone bead mobile phone pendant production
How to Craft a Silica Gel Bead Phone Charm: A Step-by-Step DIY Guide
Silica gel beads are versatile, lightweight, and come in endless colors and shapes, making them ideal for creating personalized phone charms. These small accessories add a pop of personality to your device while keeping it easy to spot in a bag or on a table. Whether you’re new to crafting or a seasoned DIY enthusiast, this guide will walk you through designing and assembling a unique silica gel bead phone charm from scratch.
Selecting Materials and Tools for Your Project
Choosing the Right Silica Gel Beads
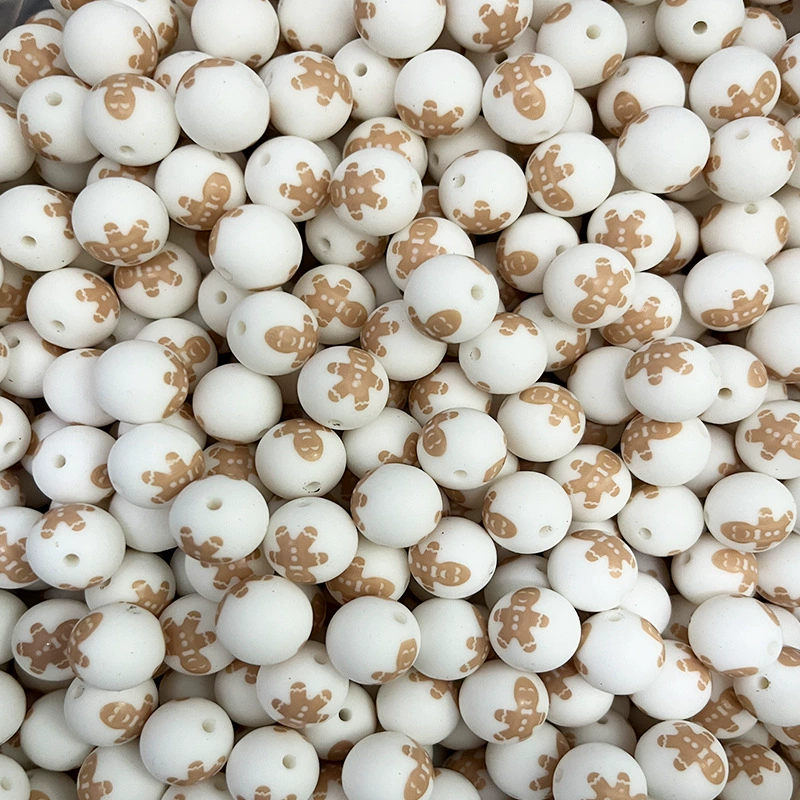
Silica gel beads come in various sizes, shapes, and finishes, allowing for endless creativity. For phone charms, consider using 6–10mm beads for a balanced look, or mix smaller and larger beads for texture. Popular shapes include spheres, stars, hearts, and geometric forms. Opt for vibrant colors, pastels, or metallic finishes depending on your style. Ensure the beads are clean and free of dust before starting to avoid imperfections in your design.
Picking Essential Hardware and Attachments
The hardware you choose will determine how your phone charm hangs and functions. Common options include:
- Phone strap loops: Small metal or plastic loops that attach to your phone case.
- Jump rings: Tiny metal rings used to connect beads or charms to the strap loop.
- Lobster clasps: Easy-to-open clasps that let you detach the charm if needed.
- Cord or thread: For beaded designs, select a sturdy nylon cord or thin metal chain.
Gathering Basic Crafting Tools
You’ll need a few simple tools to assemble your phone charm smoothly:
- Scissors: For cutting cord or thread.
- Pliers: To open and close jump rings or clasps.
- Needle-nose pliers: Helpful for manipulating small hardware.
- Tape or clipboard: To hold the cord steady while threading beads.
- Optional: A beading needle (for stiff cords) or a hole punch (if using leather).
Designing Your Phone Charm’s Aesthetic
Planning a Simple Single-Strand Design
A single-strand charm is quick to make and perfect for beginners.
- Choose a pattern: Decide whether you want alternating colors, a repeating shape, or a random arrangement. Lay out beads on a flat surface to visualize the design before threading.
- Measure the cord: Cut a piece of cord or chain long enough to hold your beads and attach to the hardware. For most designs, 4–6 inches is sufficient.
- Secure the cord: Tape one end to a table or use a clipboard to keep it steady while you work.
Creating a Multi-Strand or Layered Charm
For a more intricate look, combine multiple strands.
- Weave each strand separately: Use the same or different patterns for each cord. For example, one strand could feature solid-colored beads, while another uses mixed shapes.
- Vary the lengths: Cut each cord 1–2 inches shorter than the previous one to create a layered effect when the charm hangs.
- Attach all strands together: Use a jump ring or a large bead to connect the ends of all cords before adding the phone strap loop.
Adding Spacers or Charms for Visual Appeal
Spacers (tiny beads or metal discs) and additional charms can elevate your design.
- Place spacers strategically: Insert a spacer between every few beads to create definition. For example, use a silver spacer after every three colored beads.
- Attach extra charms: Thread a jump ring through the charm’s loop and onto the cord before adding beads. Position it at the center for a focal point or near the hardware for a subtle accent.
- Secure firmly: Ensure spacers and charms are tightly threaded to prevent shifting during use.
Assembling Your Phone Charm Step by Step
Threading Beads onto the Cord
- Start at one end: If using a jump ring or clasp, attach it to one end of the cord with a secure knot (or use a crimp bead for metal chains).
- Add beads in sequence: Follow your chosen pattern, sliding each bead onto the cord. If the beads are small or the cord is stiff, use a beading needle to guide it through.
- Check tension: Pull the cord gently after each bead to keep the design even. Avoid overtightening, which can warp the pattern.
Attaching the Phone Strap Loop
- For cord with jump rings: Once all beads are threaded, tie a double knot at the other end of the cord. Slide a jump ring onto the knot and pull tight to secure it. Then, attach the jump ring to the phone strap loop.
- For metal chains: Use pliers to open a jump ring, thread it through the last bead or link, and attach it to the phone strap loop. Close the jump ring firmly.
- For layered designs: Gather all strands at the top, thread them through a large bead or jump ring, and attach the phone strap loop as described above.
Reinforcing the Charm for Longevity
To ensure your phone charm lasts, add extra security to the attachments.
- Use crimp beads (for chains): If working with metal chain, add a crimp bead near the clasp. Squish it flat with pliers to prevent the chain from unraveling.
- Add a dab of glue (for cords): For nylon or leather cords, apply a small amount of clear glue to the knot before trimming excess cord. This prevents fraying.
- Double-check hardware: Ensure all jump rings, clasps, and phone strap loops are closed tightly to avoid losing beads or detaching the charm.
Customizing Your Phone Charm for Different Styles
Incorporating Themed Beads or Symbols
Make your phone charm meaningful by using beads that reflect your interests or personality.
- Nature theme: Add leaf-shaped beads, floral patterns, or earthy tones like greens and browns.
- Celestial theme: Use star-shaped beads, moon charms, or shades of blue and silver.
- Hobby-inspired: If you love reading, include book-shaped beads; for music lovers, add musical note charms.
Adjusting the Charm’s Size and Shape
Phone charms can be made in various sizes to suit different preferences.
- Mini charm: Use fewer beads and a small jump ring for a compact design that dangles discreetly.
- Standard charm: Aim for 3–5 inches of beaded length for a balanced look that’s easy to spot.
- Statement charm: Add extra beads, charms, or layers for a bold, eye-catching accessory.
Experimenting with Color Combinations
Play with colors to create a charm that matches your mood or outfit.
- Monochromatic: Stick to one color family (e.g., shades of pink) for a sleek, cohesive look.
- Complementary colors: Pair hues opposite each other on the color wheel (e.g., purple and yellow) for vibrant contrast.
- Neutral palette: Use whites, grays, and beiges for a minimalist, elegant charm.
By following these steps, you can craft a silica gel bead phone charm that’s both functional and stylish. Whether you prefer simple designs or elaborate creations, the process is easy to customize. Start experimenting with different patterns, colors, and embellishments to make each charm uniquely yours.


Leave a reply